
Getting a home ready to sell can feel overwhelming and full of guesswork. Buyers are quick to judge and their first impressions stick. But did you know that 82 percent of buyers’ agents say staging helps clients visualize themselves living in a space? Most people think tidying up is enough, but the real secret is a strategic approach that goes way beyond cleaning. The biggest surprises often come from small details and fresh eyes, not from major renovations.
Table of Contents
- Step 1: Assess Your Current Situation
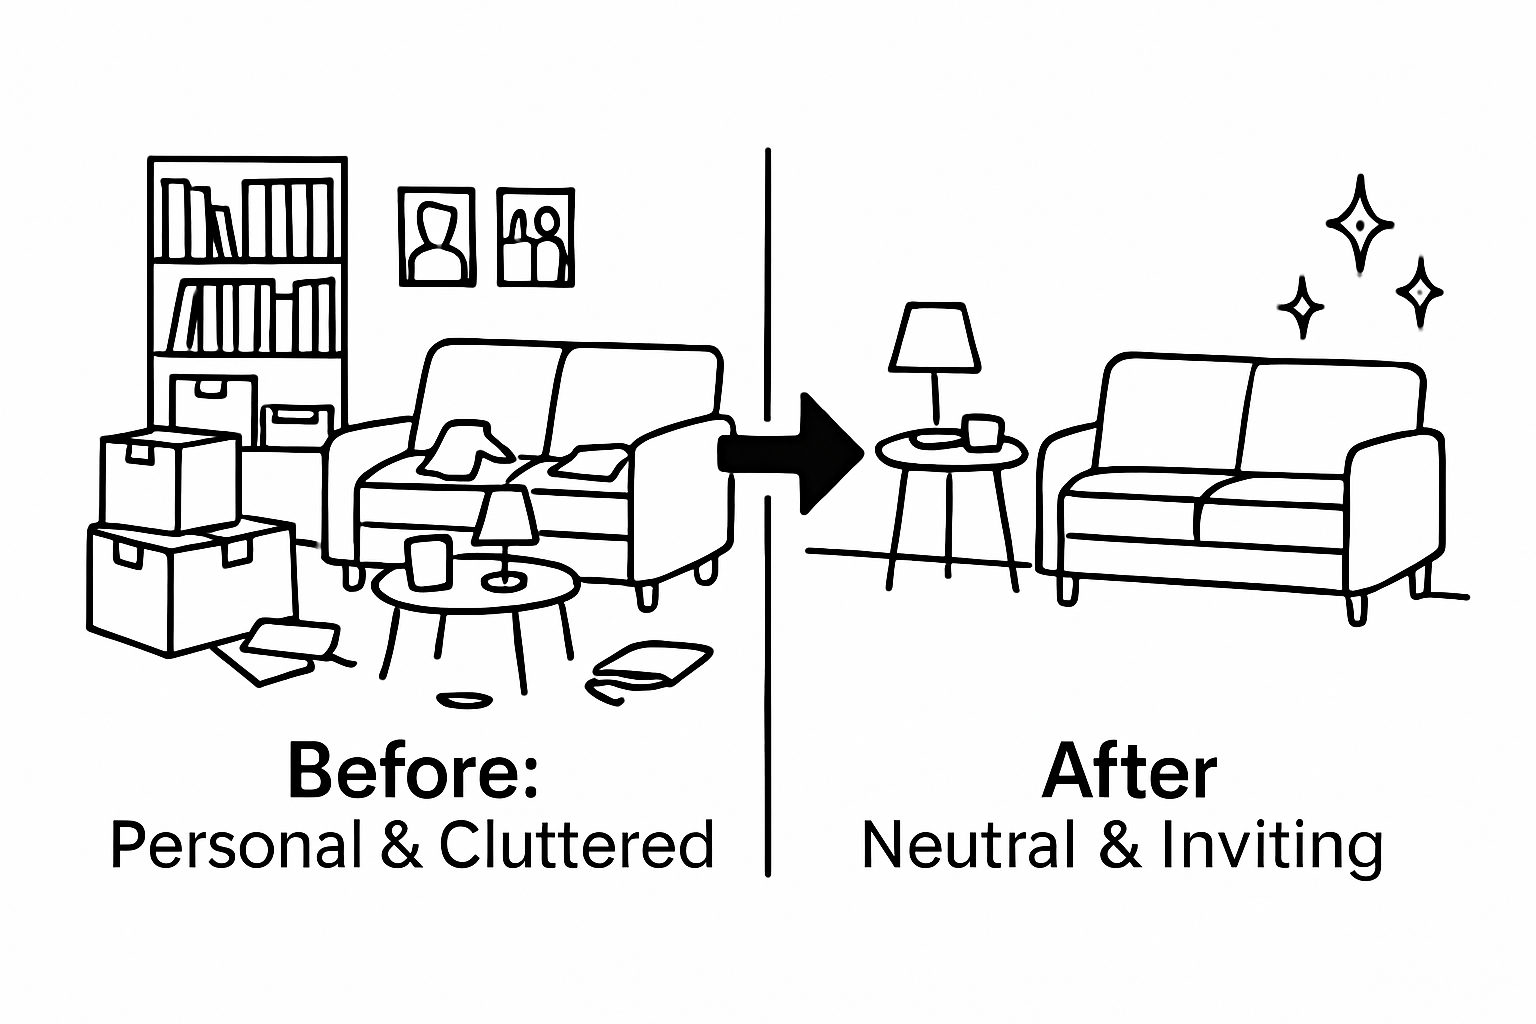
- Step 2: Declutter And Depersonalize Your Space
- Step 3: Clean And Make Minor Repairs
- Step 4: Arrange Furniture For Optimal Flow
- Step 5: Add Finishing Touches And Home Accents
- Step 6: Verify Staging Effectiveness And Make Adjustments
Quick Summary
| Key Point | Explanation |
|---|---|
| 1. Assess current property objectively | Conduct a thorough evaluation of your home’s condition, identifying areas needing attention to enhance market appeal. |
| 2. Declutter for a neutral environment | Systematically remove personal items to create a blank canvas that allows potential buyers to envision themselves in the space. |
| 3. Deep clean and make minor repairs | Perform a comprehensive cleaning and address small repairs to signal that the home is well-maintained and ready for buyers. |
| 4. Optimize furniture arrangement | Arrange furniture to maximize flow and highlight key features of each room, ensuring spaces feel inviting and spacious. |
| 5. Add finishing touches with accent pieces | Use carefully selected accents and appropriate lighting to create an emotional connection, making the home more captivating to buyers. |
Step 1: Assess Your Current Situation
Staging a home requires a strategic approach that begins with an honest, comprehensive evaluation of your current property’s condition and potential market appeal. Before diving into transformative changes, you need to understand exactly what you’re working with and identify areas requiring the most attention.
Start by conducting a thorough walk-through of your entire home, viewing each space as a potential buyer would. Grab a notebook and critically examine every room, hallway, and exterior space. Look beyond your personal attachments and focus on objective observations about appearance, functionality, and first impressions. According to the National Association of Realtors, 82% of buyers’ agents confirm that staging helps clients visualize themselves living in a space.
Key Areas of Assessment
Your evaluation should cover multiple dimensions beyond simple aesthetics. Consider the following critical elements during your assessment:
- Structural condition of walls, floors, and ceilings
- Overall color scheme and potential need for neutral repainting
- Furniture placement and potential space constraints
- Natural and artificial lighting quality
- Current cleanliness and potential maintenance requirements
- Exterior curb appeal and landscaping condition
Document your findings meticulously. Photograph each room from multiple angles, which will help you track progress and identify specific areas needing improvement. Digital photos provide an objective perspective that can reveal issues not immediately apparent during a physical walkthrough.
Pay special attention to potential buyer deterrents. These might include outdated fixtures, visible wear and tear, cluttered spaces, or overly personalized decor that could make it challenging for potential buyers to imagine themselves in the home. The goal of this assessment is not to criticize but to create a strategic roadmap for transformation that maximizes your property’s marketability and potential sale price.
Remember that a comprehensive assessment sets the foundation for effective home staging. By understanding your starting point with clarity and objectivity, you’ll be well-positioned to make targeted, impactful improvements that can significantly enhance your home’s appeal to potential buyers.
Step 2: Declutter and Depersonalize Your Space
Decluttering and depersonalizing represent critical transformative steps in home staging that dramatically enhance your property’s marketability. This process goes beyond simple cleaning – it’s about creating a neutral, welcoming environment that allows potential buyers to envision themselves living in your space.
Begin by systematically removing personal items that anchor your individual identity to the home. Family photographs, personalized artwork, collection displays, and highly specific decor pieces should be carefully packed away. The goal is to create a blank canvas that invites potential buyers to imagine their own life unfolding within these walls. According to AARP, this strategic approach significantly increases a home’s appeal and potential for a quicker sale.
Your decluttering process should follow a room-by-room strategy. Start with high-traffic areas like living rooms, kitchens, and entryways. Remove excess furniture that makes spaces feel cramped, leaving only pieces that highlight the room’s potential functionality. Aim to create a sense of spaciousness and potential. This might mean temporarily storing extra chairs, side tables, or bulky items that interrupt the natural flow of each space.
For practical execution, invest in neutral storage solutions like clean, stackable plastic containers or rental storage units. These will help you organize personal items efficiently while preparing your home for potential buyers. Consider our guide on efficient packing methods to streamline this process.
Verification Checklist for Successful Decluttering
- Surfaces are 90% clear of personal items
- No more than 3-4 decorative items per surface
- Personal photographs are completely removed
- Closets appear spacious and organized
- Minimal furniture allows easy movement through rooms
Remember that emotional attachment can make decluttering challenging. Approach this task objectively, treating your home as a product to be marketed rather than a personal sanctuary. By creating a neutral, inviting environment, you’re significantly increasing your chances of attracting potential buyers and securing a successful, swift sale.
Here is a handy checklist to help you ensure each space is decluttered and depersonalized effectively before moving to the next staging step.
| Area/Item | Decluttering Criteria | Completed (Y/N) |
|---|---|---|
| Surfaces | 90% clear of personal items | |
| Decorative Items | No more than 3-4 per surface | |
| Personal Photographs | Completely removed | |
| Closets | Appear spacious and organized | |
| Furniture Arrangement | Minimal pieces, allows easy movement | |
| High-Traffic Areas | Free from excess furniture/clutter | |
| Storage Areas | Items stored in neutral containers/units |
Step 3: Clean and Make Minor Repairs
Cleaning and addressing minor repairs represent the critical transformation phase that elevates your home from simply decluttered to market-ready. This step is about creating a pristine, well-maintained environment that signals to potential buyers that the property has been carefully preserved and is worth their investment.
Begin with a comprehensive deep cleaning approach that goes beyond standard surface maintenance. Professional-level cleaning means addressing every inch of your living space with meticulous attention. This includes scrubbing baseboards, washing windows inside and out, cleaning light fixtures, and ensuring floors shine with spotless perfection. Pay special attention to often-overlooked areas like ceiling corners, behind appliances, and inside cabinets. According to AARP, a thoroughly cleaned home creates an immediate positive impression that can significantly influence buyer perception.
Simultaneously, tackle minor repairs that might signal potential maintenance issues to discerning buyers. Walk through your home with a critical eye, identifying small imperfections that could raise red flags. Patch nail holes in walls, touch up paint, repair loose door handles, and fix any squeaky hinges. These seemingly minor repairs communicate that the home has been meticulously maintained. Consider investing in some basic tools like spackling compound, paint touch-up kits, and a reliable caulking gun to address these quick fixes efficiently.
Essential Repair and Cleaning Toolkit
- Spackling compound and putty knife
- Paint touch-up kit matching wall colors
- White vinegar and microfiber cloths
- Caulking gun and neutral-colored caulk
- Magic erasers for scuff marks
- Wood touch-up markers
Don’t underestimate the power of professional-grade cleaning products and techniques. Rent or purchase a steam cleaner for carpets, use specialized cleaners for different surfaces, and consider hiring professional cleaners for a truly transformative deep clean. The investment in thorough cleaning and minor repairs can translate directly into increased buyer interest and potentially higher sale prices.
Below is a summary of the essential cleaning and repair tools used to prepare your home for showings, along with their main purposes during the staging process.
| Tool/Material | Purpose |
|---|---|
| Spackling compound | Patch nail holes and wall imperfections |
| Paint touch-up kit | Refresh small wall areas for a clean look |
| White vinegar/cloths | Disinfect, clean various surfaces |
| Caulking gun/caulk | Seal gaps around fixtures and baseboards |
| Magic erasers | Remove scuff marks from walls/surfaces |
| Wood touch-up markers | Conceal scratches or blemishes on wood |
| Steam cleaner | Deep-clean carpets/rugs |
Verify your work by taking photographs of each room after cleaning and repairs. Step back and view these images objectively, as a potential buyer would. Look for consistent shine, seamless repairs, and an overall sense of well-maintained, move-in-ready space. Your goal is to create an environment that feels fresh, cared for, and immediately appealing to potential buyers.
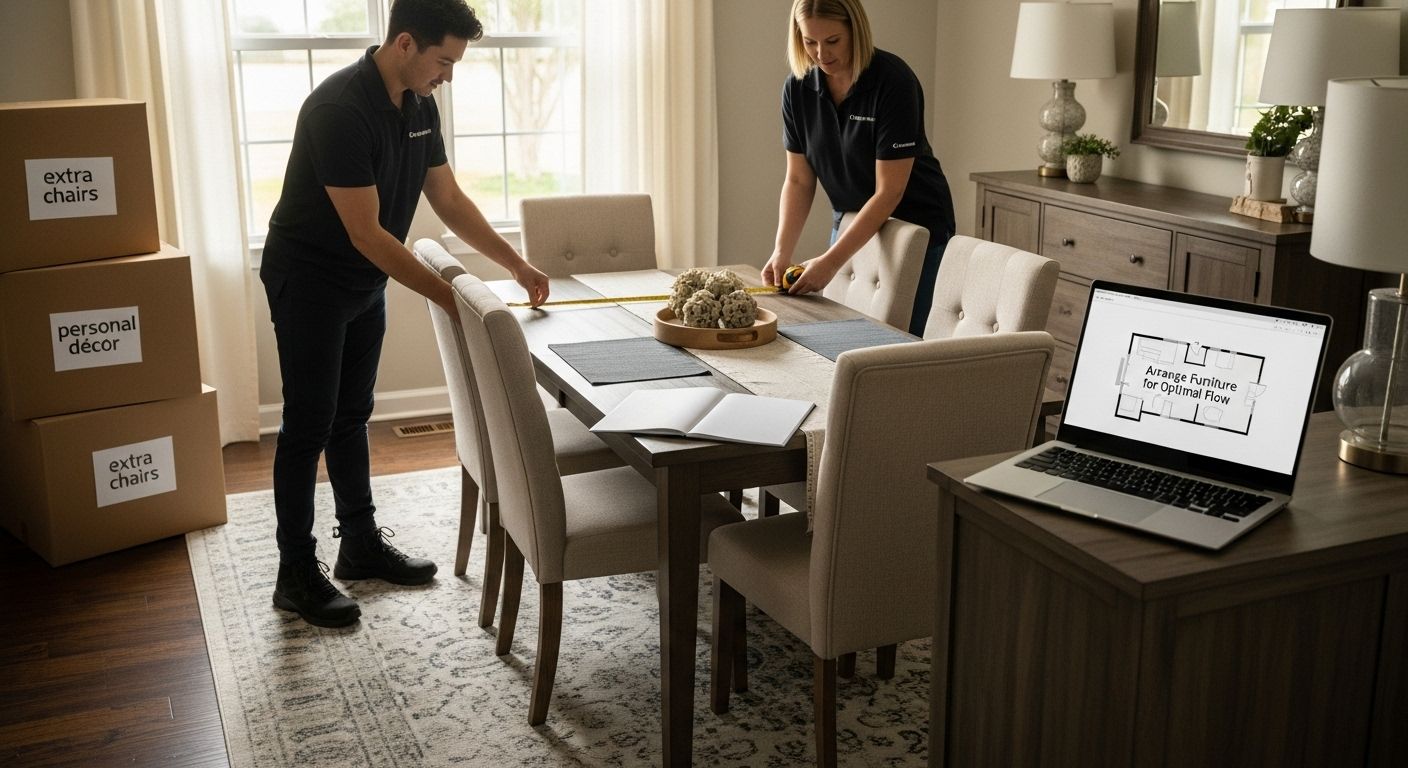
Step 4: Arrange Furniture for Optimal Flow
Furniture arrangement is the strategic art of transforming your living spaces into inviting, spacious environments that showcase your home’s potential. This step is about creating visual harmony, maximizing perceived space, and helping potential buyers imagine themselves living comfortably within your home.
Spatial choreography begins with understanding the fundamental principles of flow and openness. Remove excess furniture that clutters rooms and blocks natural walking paths. Each piece should serve a purpose, creating conversation areas that feel intentional and welcoming. According to Pennsylvania Realtors, the key is to position furniture to highlight architectural features and create a sense of natural movement through the space.
Consider each room’s focal point and arrange furniture to complement and draw attention to these areas. In living rooms, this might mean positioning seating to frame a fireplace or large window. Bedrooms should showcase the room’s dimensions by placing beds against the most visually appealing wall, leaving enough space for comfortable movement. Create invisible pathways that allow potential buyers to walk through rooms effortlessly. You might want to explore our expert tips on optimizing living spaces for additional insights.
Room Flow Verification Checklist
- Can you walk through each room without touching furniture?
- Do furniture arrangements highlight room’s best features?
- Are conversation areas naturally defined?
- Is there balanced visual weight in the room?
- Do furniture pieces create a sense of spaciousness?
Pay special attention to scale and proportion. Oversized furniture can make rooms feel cramped, while too-small pieces can make spaces seem empty and undefined. Use a tape measure to ensure furniture fits proportionally, leaving approximately 30-36 inches of walking space between pieces. Consider using area rugs to define spaces and create visual cohesion, helping potential buyers understand how different areas of a room can be utilized.
Finally, step back and photograph each room from multiple angles. These images will help you objectively assess your furniture arrangement, ensuring that each space feels open, inviting, and full of potential. Your goal is to create an environment that feels effortlessly livable, allowing buyers to easily envision their own life unfolding within these walls.
Step 5: Add Finishing Touches and Home Accents
Finishing touches transform a staged home from merely clean and organized to truly captivating. This critical step is about creating emotional connection and visual appeal that helps potential buyers imagine themselves living in the space. Think of these final details as the visual storytelling that brings your home’s potential to life.
Color and texture become your primary storytelling tools. Strategically placed accent pieces can breathe life into neutral spaces without overwhelming them. According to National Real Estate Board, fresh flowers and carefully selected accessories can make your home stand out in a competitive market. Select a refined color palette that complements your home’s existing tones – think soft blues, warm neutrals, and gentle greens that create a sense of calm and possibility.
Consider your accent pieces as carefully as a curator might select museum exhibits. A few well-chosen throw pillows, a strategically placed ceramic vase, or an elegant throw blanket can transform a room’s energy. Aim for sophistication through simplicity. Group accessories in odd numbers, which create more visual interest than even-numbered arrangements. Place a stack of elegant coffee table books, add a single large plant in a clean, modern pot, or display a piece of artwork that draws the eye without dominating the space.
Accent Placement Verification Checklist
- No more than 3-5 accent pieces per room
- Accessories create visual balance
- Colors complement existing room tones
- Textures add depth without cluttering
- Each accent serves a visual purpose
Lighting plays a crucial role in these final touches. Replace dated lampshades, consider adding soft ambient lighting with strategically placed table lamps, and ensure window treatments allow maximum natural light. Your goal is to create a space that feels both aspirational and immediately livable. Explore our expert tips on creating inviting spaces for additional insights into home presentation.
Finally, step back and view your space with fresh eyes. Photograph each room and critically evaluate whether the accents enhance the space or distract from its inherent beauty. The perfect staging feels effortless – as though the home is waiting to welcome its new owners, telling a story of comfort, possibility, and potential.
Step 6: Verify Staging Effectiveness and Make Adjustments
Verification represents the critical final phase of home staging, transforming your meticulous preparation into a strategic presentation that maximizes buyer appeal. This step is about objectively assessing your work and making precise refinements that elevate your home’s marketability.
Photographic analysis provides the most unbiased perspective on your staging efforts. Take high-resolution digital photographs of each room from multiple angles, precisely mimicking potential buyer viewpoints. These images will reveal nuances invisible to the naked eye – awkward furniture placements, color imbalances, or areas that feel cluttered despite seeming organized in person. According to the National Association of Realtors, 81% of buyers’ agents confirm that effective staging helps buyers visualize themselves in a property.
Consider inviting an objective third party – perhaps a real estate professional or a trusted friend with a keen eye for design – to walk through your staged home. Their fresh perspective can highlight potential improvements you might have overlooked. Listen carefully to their observations without becoming defensive. Sometimes, minor adjustments like rotating a chair, removing a single accent piece, or adjusting lighting can dramatically transform a room’s perceived space and appeal.
Staging Effectiveness Verification Checklist
- Photographs reveal clean, uncluttered spaces
- Each room feels inviting and purposeful
- Lighting enhances room’s natural attributes
- Furniture placement creates natural flow
- Accent pieces complement overall design
Pay special attention to sensory details beyond visual aesthetics. Ensure your home has a neutral, pleasant ambient temperature. Open windows briefly to circulate fresh air, remove any lingering cooking or pet odors, and consider subtle, natural fragrances like fresh linen or light citrus. Explore our expert recommendations for creating welcoming spaces to refine your staging approach.
Remember that staging is an iterative process. Be prepared to make continuous, subtle adjustments. The goal is not perfection but creating an environment that feels simultaneously aspirational and immediately livable. Your home should tell a story of potential – inviting buyers to imagine their future within its walls, while remaining neutral enough to accommodate their personal dreams and lifestyle.
Ready to Stage and Move With Confidence?
Preparing your home for a quick sale can feel overwhelming. Sorting clutter, cleaning up, making repairs and rearranging spaces all add to the pressure of moving on top of selling. The article highlighted how important it is to create a neutral, appealing home that invites buyers to imagine their own story. But once your home looks perfect, you still face the stress of packing, transporting delicate items, and ensuring a seamless transition.

Let Next Door Mover take the load off your shoulders. Our experienced team specializes in careful handling from packing to safe delivery. Whether you need to relocate fine art, antiques or want your furniture arranged by professionals, we manage it all across New Jersey. Need help with efficient packing? We offer proven tips and full-service solutions for every unique need. When your home is staged and ready, trust our dedicated movers for a smooth, hassle-free move. Visit Next Door Mover now to request your free quote and see how we turn staging success into a successful move. The perfect presentation is just the first step—secure peace of mind for your move with experts who care.
Frequently Asked Questions
How can I assess my home’s current condition before staging?
To assess your home, conduct a thorough walk-through while critically evaluating each room’s appearance, functionality, and first impressions. Document structural conditions, color schemes, and overall cleanliness to identify areas needing attention.
What are the key steps for decluttering and depersonalizing a home?
Start by removing personal items like family photos and highly specific decor. Focus on creating an inviting, neutral environment that allows potential buyers to envision themselves in the space, following a room-by-room approach for efficiency.
What minor repairs should I focus on before staging my home?
Concentrate on patching nail holes, touching up paint, fixing loose door handles, and addressing any squeaky hinges. These small repairs show that the home has been well-maintained, increasing its appeal to buyers.
How can I arrange furniture to enhance the flow in my home?
Remove excess furniture that clutters rooms and obstructs walkways. Arrange remaining pieces to highlight key focal points, creating defined conversation areas while maintaining a sense of spaciousness and ease of movement.